 Pin It
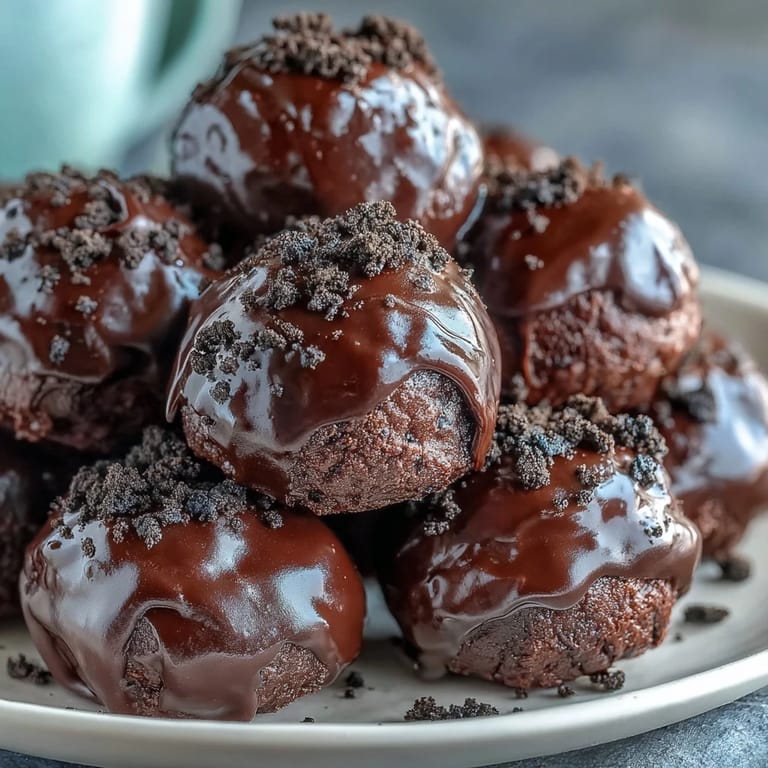
 You know it's a good day in the kitchen when the only sounds are a food processor whirring, chocolate gently melting, and the not-so-subtle scraping of a spoon against the mixing bowl. The first time I tried making these No-Bake Oreo Truffles, I wasn't aiming to impress anyone—honestly, I just wanted something sweet without turning on the oven. There’s a certain joy in seeing a mound of cookie crumbs and cream cheese come together so easily. The aroma of crushed Oreos fills the air, hinting at the decadence to come, while melted chocolate promises a smooth finish. What amazed me most was how these simple ingredients transformed into truffles that looked so elegant they might as well have come from a fancy patisserie.
Last winter, my niece and I made a double batch of these truffles while snow started piling up outside. She took charge of the cookie crushing, sampling as she went, and the kitchen smelled like a chocolate bakery by the time we were ready to roll. When we dipped the chilled rounds in warm chocolate, our laughter bounced off the windows with every messy, lopsided truffle. The best ones never looked perfect, but those were always the first to get eaten. That afternoon, our fingertips stayed dusted in Oreo crumbs—and neither of us minded one bit.
Ingredients
- Oreo cookies: The deeper the chocolate flavor, the better, so I always stick to the classic variety; use a food processor for the most consistent crumbs, but a sturdy plastic bag and rolling pin work in a pinch.
- Cream cheese (softened): Letting it sit out for a bit ensures it blends smoothly with the cookie crumbs, and always check that it’s full-fat for maximum creaminess.
- Semisweet or milk chocolate: Chopped bars melt beautifully, but good-quality chocolate chips are just as handy when you’re in a rush; melt gently so it stays glossy.
- White chocolate (optional, for drizzling): I learned to use just a touch—too much, and it can hide the flavor of the truffle inside.
- Crushed Oreo crumbs (optional, for garnish): Save a spoonful before mixing—you’ll thank yourself for the decorative sprinkle at the end.
Tired of Takeout? 🥡
Get 10 meals you can make faster than delivery arrives. Seriously.
One email. No spam. Unsubscribe anytime.
Instructions
- Get everything prepped:
- Line a baking sheet with parchment paper and gather your ingredients—no one wants to hunt for utensils with chocolatey hands later.
- Crush those Oreos:
- Pulse the cookies in a food processor until uniform and fine; when the kitchen starts to smell like pure nostalgia, you’re done.
- Mix it up:
- In a big bowl, combine the softened cream cheese with the Oreo crumbs and stir until the mixture is velvety and dark.
- Roll and chill:
- Scoop out heaping tablespoons of the mixture and roll smooth balls between your hands, then arrange them on your baking sheet before popping them in the freezer for half an episode of your favorite show.
- Melt the chocolate:
- In short bursts, microwave the chocolate until it's melted and dreamy—stir after each interval so it never scorches.
- Dunk and coat:
- Use a fork to roll each sticky, cold truffle ball in the warm chocolate, letting the excess drip away before returning it to the sheet.
- Add a flourish:
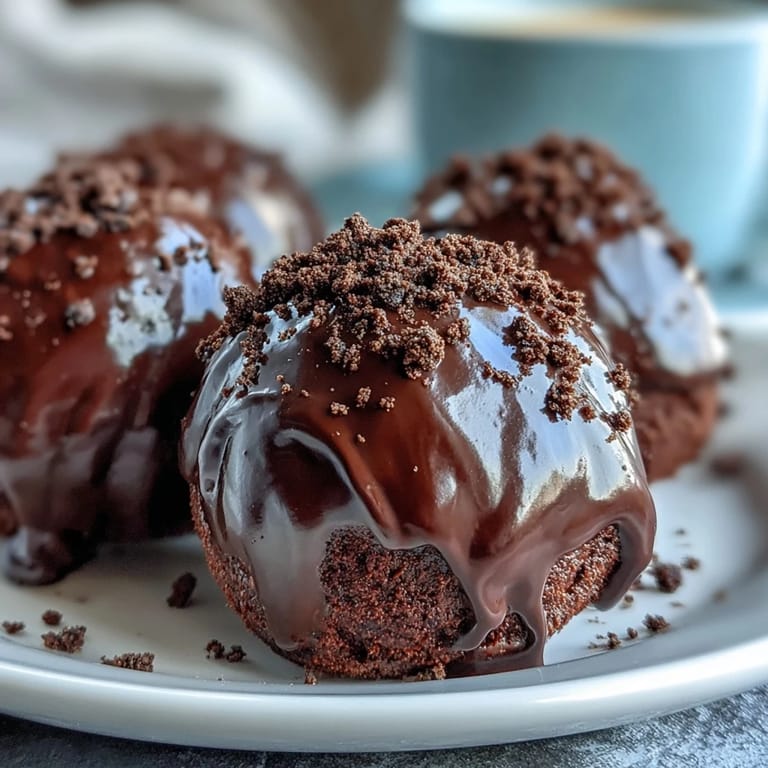
- If you’re feeling artsy, drizzle with white chocolate or scatter with Oreo crumbs while the coating is still wet.
- Chill to finish:
- Refrigerate until the chocolate shell snaps at the touch; this part tests your patience but rewards it, too.
 Pin It
 There was a birthday where these truffles were tucked on the dessert table between cupcakes and a pie, but they vanished first. It was the unstoppable grin on my dad’s face, holding his third truffle, that made me realize this recipe had become a family favorite. After that, I made sure every batch was shared—because honestly, the joy doubles when you watch everyone’s chocolate-stained smiles.
Making Your Truffles Stand Out
Swapping out the chocolate coating or decorating with colored sprinkles has turned these truffles into a festive centerpiece more than once. Around the holidays, I tint white chocolate with a drop of gel food coloring and zig-zag festive stripes across the tops. There's a playful freedom in customizing each batch, especially when kids are in charge of design—just embrace the chaos, because the results are always edible.
How to Store and Share
I've learned that packing the finished truffles in a single layer inside a lined storage container saves them from sticking or smudging. They keep in the fridge for a week, so you can sneak one whenever that craving strikes—or parcel a few into treat bags as last-minute gifts, which is how I’ve survived more than one forgotten birthday.
Troubleshooting Oreo Truffle Woes
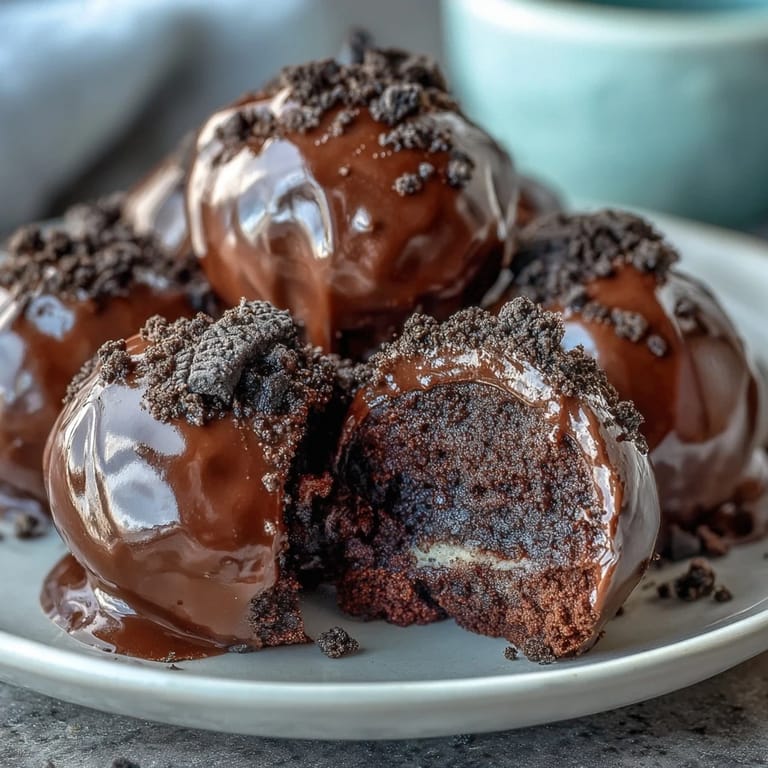
Not every batch goes according to plan. Once, I used low-fat cream cheese by mistake and the mixture became gloopy, so now I always double-check labels before mixing. If the chocolate coating gets dull instead of shiny, try stirring in 1/2 tsp of coconut oil next time—you’ll get that tempting glossy finish.
- Roll the truffle mixture with damp hands if things start to get sticky.
- If the chocolate thickens while dipping, zap it for 10 more seconds in the microwave.
- Always let the truffles set up fully before moving or serving for the best shape and snap.
 Pin It
 May every bite of these Oreo truffles remind you that the best treats come from simple magic in the kitchen. Share them with someone—or sneak one straight from the fridge for yourself.
Recipe FAQs
- → How do I achieve a smooth filling?
Ensure the cream cheese is fully softened and mix thoroughly with finely crushed Oreos until the mixture is completely smooth.
- → Do I need a food processor?
While a food processor gives finer crumbs, you can also crush Oreos in a sealed bag using a rolling pin for similar results.
- → Why chill the truffles before dipping?
Chilling firms up the centers, preventing them from falling apart or melting when dipped into the warm chocolate coating.
- → How should I store them?
Store in an airtight container in the refrigerator for up to one week to keep them fresh and the coating crisp.
- → Can I use different chocolate for coating?
Absolutely! Semisweet, dark, or milk chocolate all work well. Experiment with white chocolate for a sweeter finish.