 Pin It
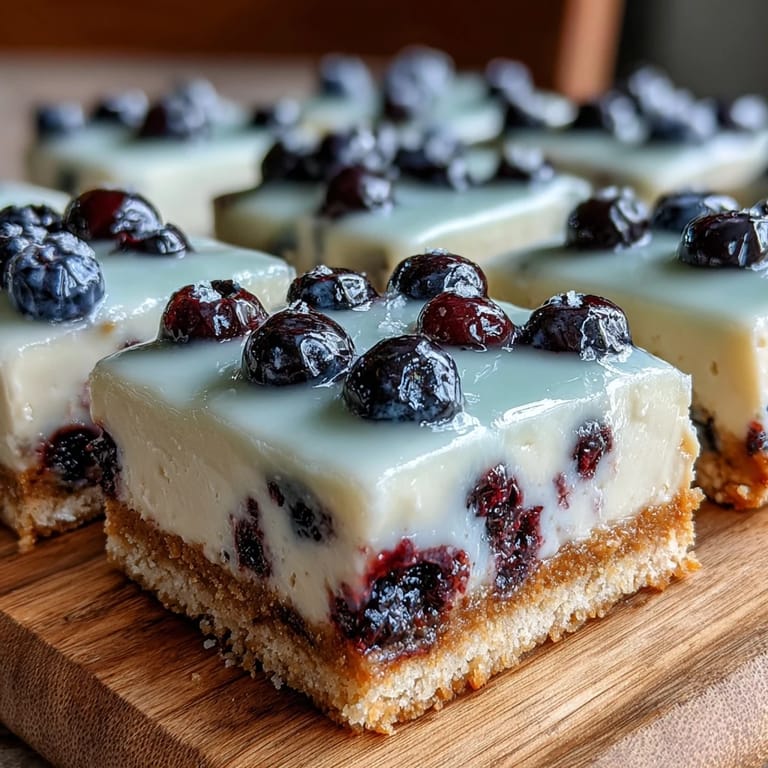
 Sunlight was streaming onto my kitchen countertop the first time I decided to skip the oven and try my hand at these No-Bake Lemon Blueberry Cheesecake Bars. The tang of lemon met the juicy pop of blueberries as I stirred the fillings, their colors swirling together like a little edible canvas. There was a quiet thrill in knowing my fridge would do the heavy lifting, transforming a few honest ingredients into something worth sharing. That first spring attempt filled my kitchen with fresh possibilities and the faint aroma of citrus.
I made these bars for my neighbor’s impromptu backyard birthday last July, and I still remember laughing with sticky blueberry fingers as we sliced them up beneath the twinkle lights. Somehow, even the kids waited their turn quietly just to see those pretty swirls revealed with every cut. Those sweet little moments made me realize this dessert always brings a pop of joy wherever it travels.
Ingredients
- Graham crackers or digestive biscuits: This is your crust’s backbone—crush them fine and press down firmly for a sturdy, buttery base.
- Unsalted butter: Melting it helps meld the crumbs and makes for a melt-in-your-mouth first bite.
- Granulated sugar: Just enough for gentle sweetness in the crust and fruit swirl.
- Cream cheese: Allow it to soften fully for the silkiest filling—don’t rush this step.
- Powdered sugar: It whips in without any grittiness, keeping the cheesecake creamy.
- Heavy cream: Cold cream whips up fluffy and light, giving loft and airiness to the filling.
- Lemon juice and zest: Use fresh—nothing brightens the taste quite like real lemon.
- Pure vanilla extract: Adds warmth and rounds out the tangy flavors.
- Blueberries: Fresh or frozen both work—just simmer gently to extract the most luscious color and taste.
- Cornstarch (with water): This creates the glossy swirl; don’t skip it or you’ll end up with runny sauce.
Tired of Takeout? 🥡
Get 10 meals you can make faster than delivery arrives. Seriously.
One email. No spam. Unsubscribe anytime.
Instructions
- Prepare your pan:
- Line a 23x23 cm baking pan with parchment paper, making sure there’s extra hanging over the sides for easy lifting later.
- Build your crust:
- Mix the crushed biscuits, melted butter, and sugar in a bowl until all the crumbs are shiny and damp, then press the mixture firmly and evenly across the pan’s base before popping it in the fridge.
- Make the blueberry swirl:
- Bring blueberries, sugar, and lemon juice to a simmer in a saucepan, smelling their sweetness as the berries burst, then stir in the cornstarch slurry—once thickened, cool fully.
- Beat the cheesecake filling:
- Cream together the softened cream cheese and powdered sugar until fluffy, then blend in lemon juice, zest, and vanilla for a zippy aroma.
- Whip the cream:
- Whip cold heavy cream to stiff peaks—it should hold its shape when you lift the whisk.
- Combine and spread:
- Gently fold whipped cream into your lemony cheese mixture, then spread it over the chilled crust as smooth as you can.
- Swirl in the blueberries:
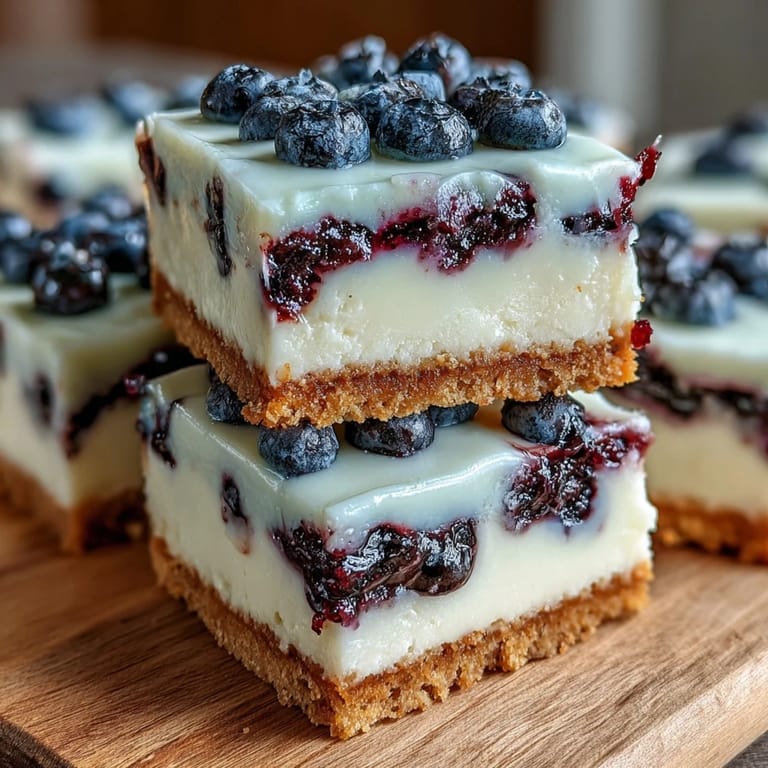
- Dollop blueberry sauce over the cheesecake, then swirl it lightly with a knife for that marbled finish.
- Chill until set:
- Cover and refrigerate for at least 4 hours, resisting the urge to peek, until the bars are firm to the touch.
- Slice and serve:
- Lift out the bars with the parchment overhang, slice into neat squares, and serve cold for the best texture and flavor.
 Pin It
 One afternoon my partner walked in just as I was swirling the blueberry sauce, and the two of us got lost naming the shapes we saw—almost too pretty to eat. That was the moment I realized these bars are as much about sharing and play as they are about taste.
No-Bake Success Starts With Texture
The crust should be compacted so well it holds together, but not so hard you need a chisel to cut through it. I found using the bottom of a glass helps press down evenly—don’t hesitate to get hands-on for that perfect bite.
Swirling Secrets for Stunning Bars
Swirling the blueberry sauce takes patience and a delicate touch. There’s a real pleasure in watching the deep purple ribbons tug through the pale cheesecake, and going slow ensures you get that beautiful marbled pattern every time.
Troubleshooting and Serving Tips
If your filling looks lumpy, it usually means the cream cheese was too cold or overmixed—smooth it out next time by letting it sit longer at room temperature. Always use a sharp knife rinsed in hot water for the cleanest slices, and serve bars straight from the fridge for the creamiest bite.
- Don’t try shortcuts on chilling time, even if you’re in a hurry.
- Leftovers keep best when covered tightly to avoid picking up other fridge flavors.
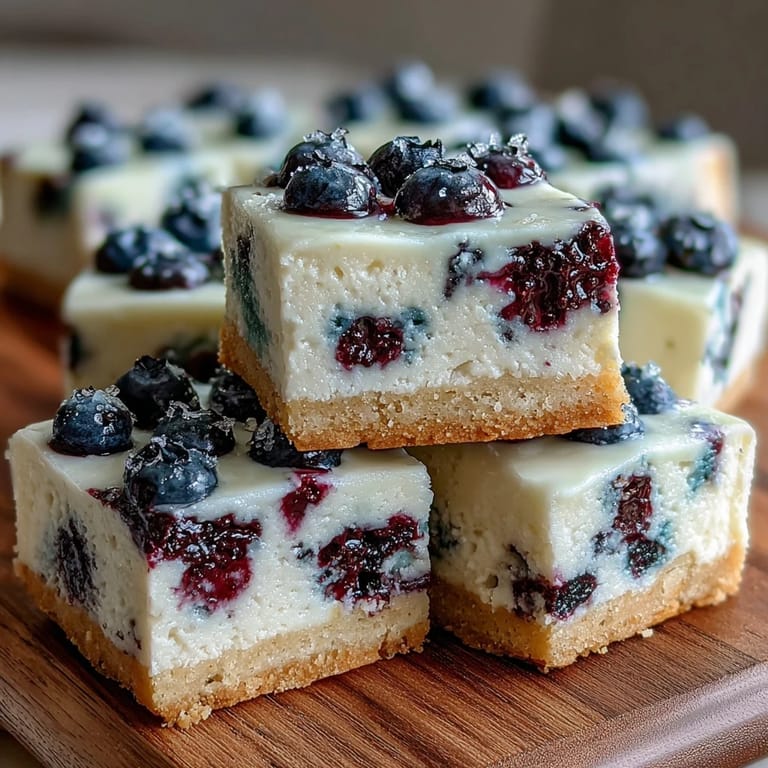
- You can sprinkle a few fresh berries on top just before serving for a pretty finish.
 Pin It
 May your kitchen be filled with bright flavor, beautiful swirls, and just enough anticipation to make those first chilled slices taste all the sweeter. These bars always disappear fast—don’t be surprised if you need to make another batch soon.
Recipe FAQs
- → How long do these bars need to chill?
Chill at least 4 hours or until firmly set for the best texture and easy slicing.
- → Can I use frozen blueberries?
Yes, both fresh and frozen blueberries work well for the swirl; just simmer until thickened.
- → What type of cookies are best for the crust?
Graham crackers or digestive biscuits are ideal, but gluten-free alternatives also work.
- → Can the bars be made in advance?
Absolutely! Prepare a day ahead and store chilled for up to three days for best freshness.
- → How do I get a perfect swirl?
Dollop blueberry mixture over the filling, then gently swirl with a knife or skewer for a marbled effect.